Picking a 700 point fleet was simple for me: I took the 650 pointer that was my fleet after the first expansion and plugged a 50 point cruiser in. I considered swapping the Kraken for another frigate, but that would have broken my 4 frigate squadron into a 3 and a 2, which I wasn't too thrilled about, so I stuck with the sub. This was also the first time I ran the heavies together as a squadron instead of mixing them in with the regular cruisers. My list:
Battleship - 120
Airship - 85
2 Heavy Cruisers - 170
3 Cruisers - 150
4 Frigates - 140
Kraken - 35
700 total
EV was a bit over on his cruiser limit, but it didn't bother anyone, especially as he was under points anyway. His list:
Flagship - 155
2 Heavy Cruisers - 150
2 Cruisers - 110
2 Cruisers - 110
3 Frigates - 90
Ripper - 65
680 total
Kairaven had a battleship and a flagship at first, but once we got on the same page about battleship allowances he swapped the flagship for a battlecruiser and added a frigate. His list:
Battleship - 110
Battlecruiser - 110
3 Cruisers - 180
3 Frigates/2 Destroyers - 180
4 Frigates - 120
700 total
VAtank managed to slip some Martyrs by me at first, though I spotted them as the game went on. His list:
Flagship - 140
2 Heavy Cruisers - 150
3 Cruisers - 165
3 Frigates - 90
3 Frigates - 90
2 Martyrs - 50
685 total
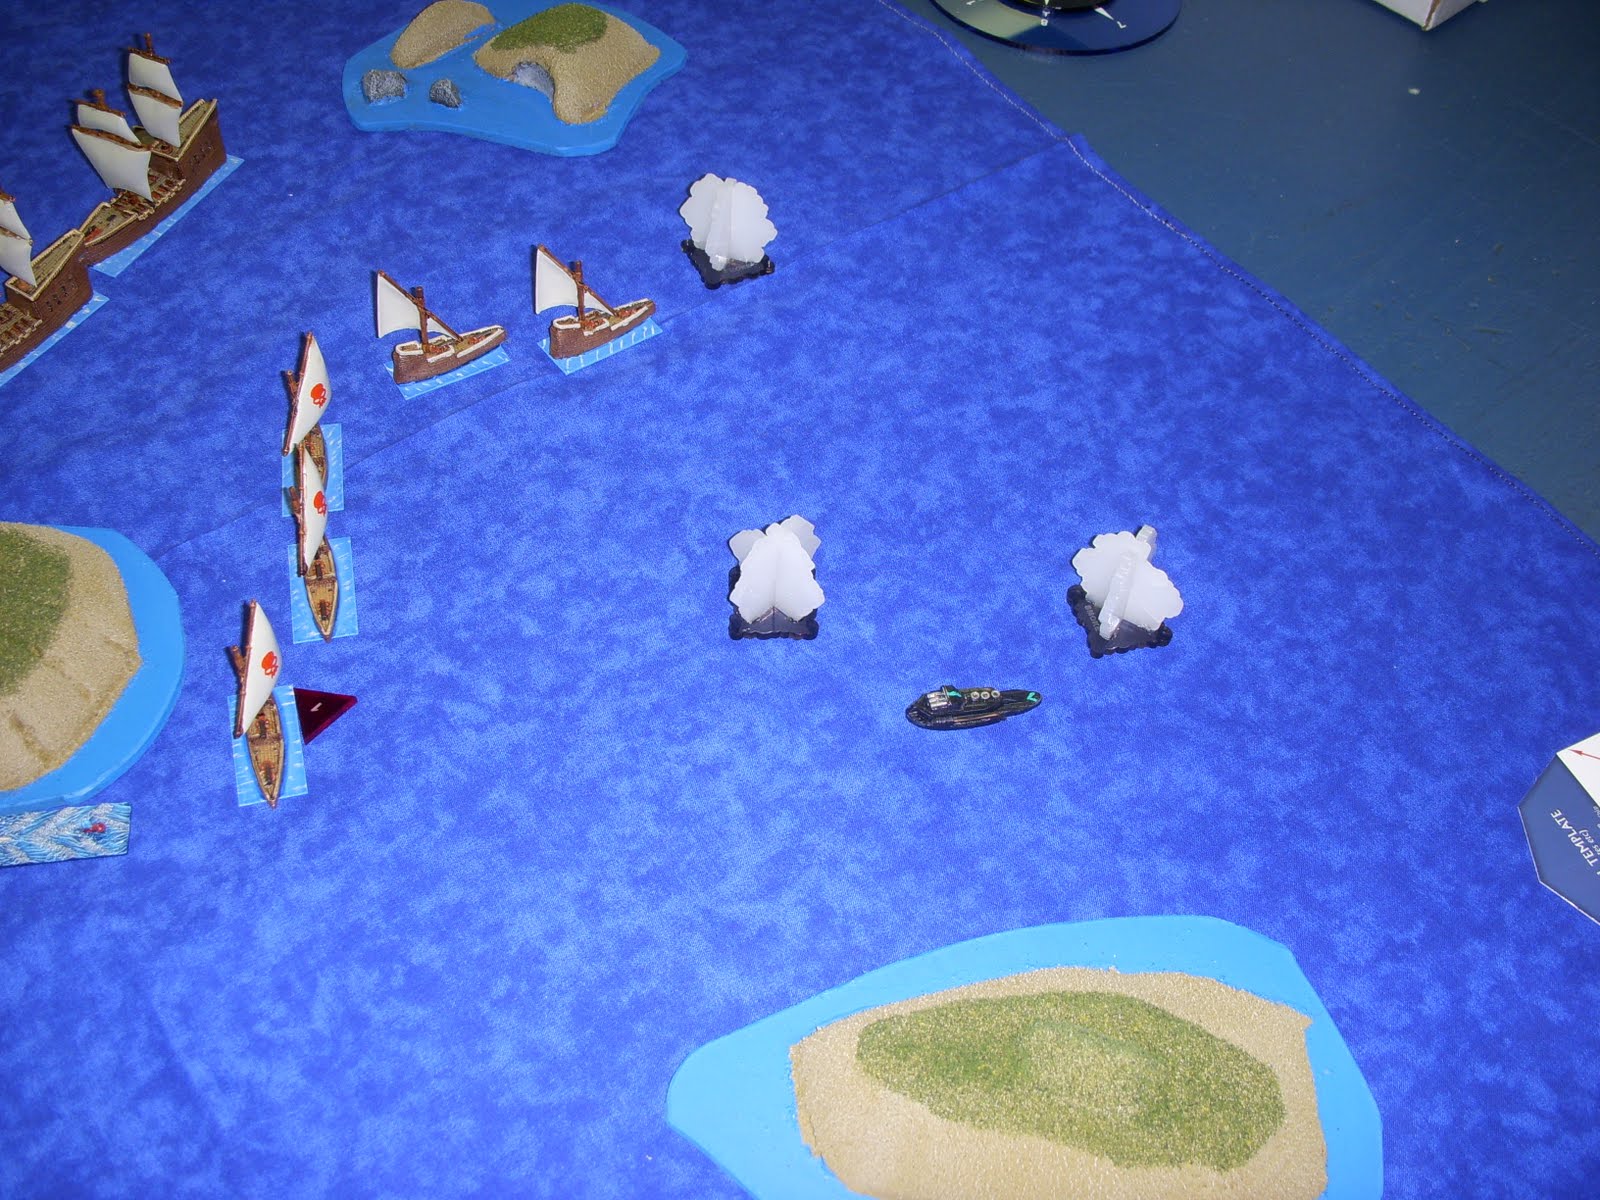
It's very possible I've gotten a list that isn't mine wrong, but I think these are pretty accurate. I did a bit of planning with EV before the game start. It consisted of me writing "Me = Anvil, You=Hammer, Meet in the middle," showing it to him, and him giving me the thumbs-up. It was a simple plan, but sometimes those work the best. We didn't really have any communication problems as the game went along, though I wished we both new Turkish or some other language to converse in freely, though the lack of communication did add a bit to the authentic naval experience. I kept my ships together, except for the airship which I put in the "Hammer" contingent. For the most part we all ignored the southern end of the board, though Kairaven did stick his battleship and some frigates down there. My plan, such as it was, was to sail into the gap between the island with the Kraken on it and the one to its southwest, then maybe drop anchor and pound the center. I had my sub way up north. The setup shot about to follow, plus all the turn shots, aren't from the best angle ever. I had to lean over the table to take them, so the southern end of the board looks fine while the northern end gets a bit compressed. These things happen. Setup:

Turn one was actually a bit more eventful than the usual positioningfest. I knew the Orcs had a mortar and had previously wondered how it worked. I found out quickly, as it scored a direct hit from long range and dinged two of my cruisers.

That was all the action. I should note the wind, which I was so eager to play a game with. It never mattered. It started the game blowing directly behind the wind-using fleets. I played a wind change card, but it didn't do anything effective. So much for experiencing wind and trying to turn it to my advantage. Outside the mortar, nothing much happened. The Dragonlord ships are conspicuous in this shot, at least they are to me, so here's a note that they're standing in for Orc destroyers. End of turn 1.

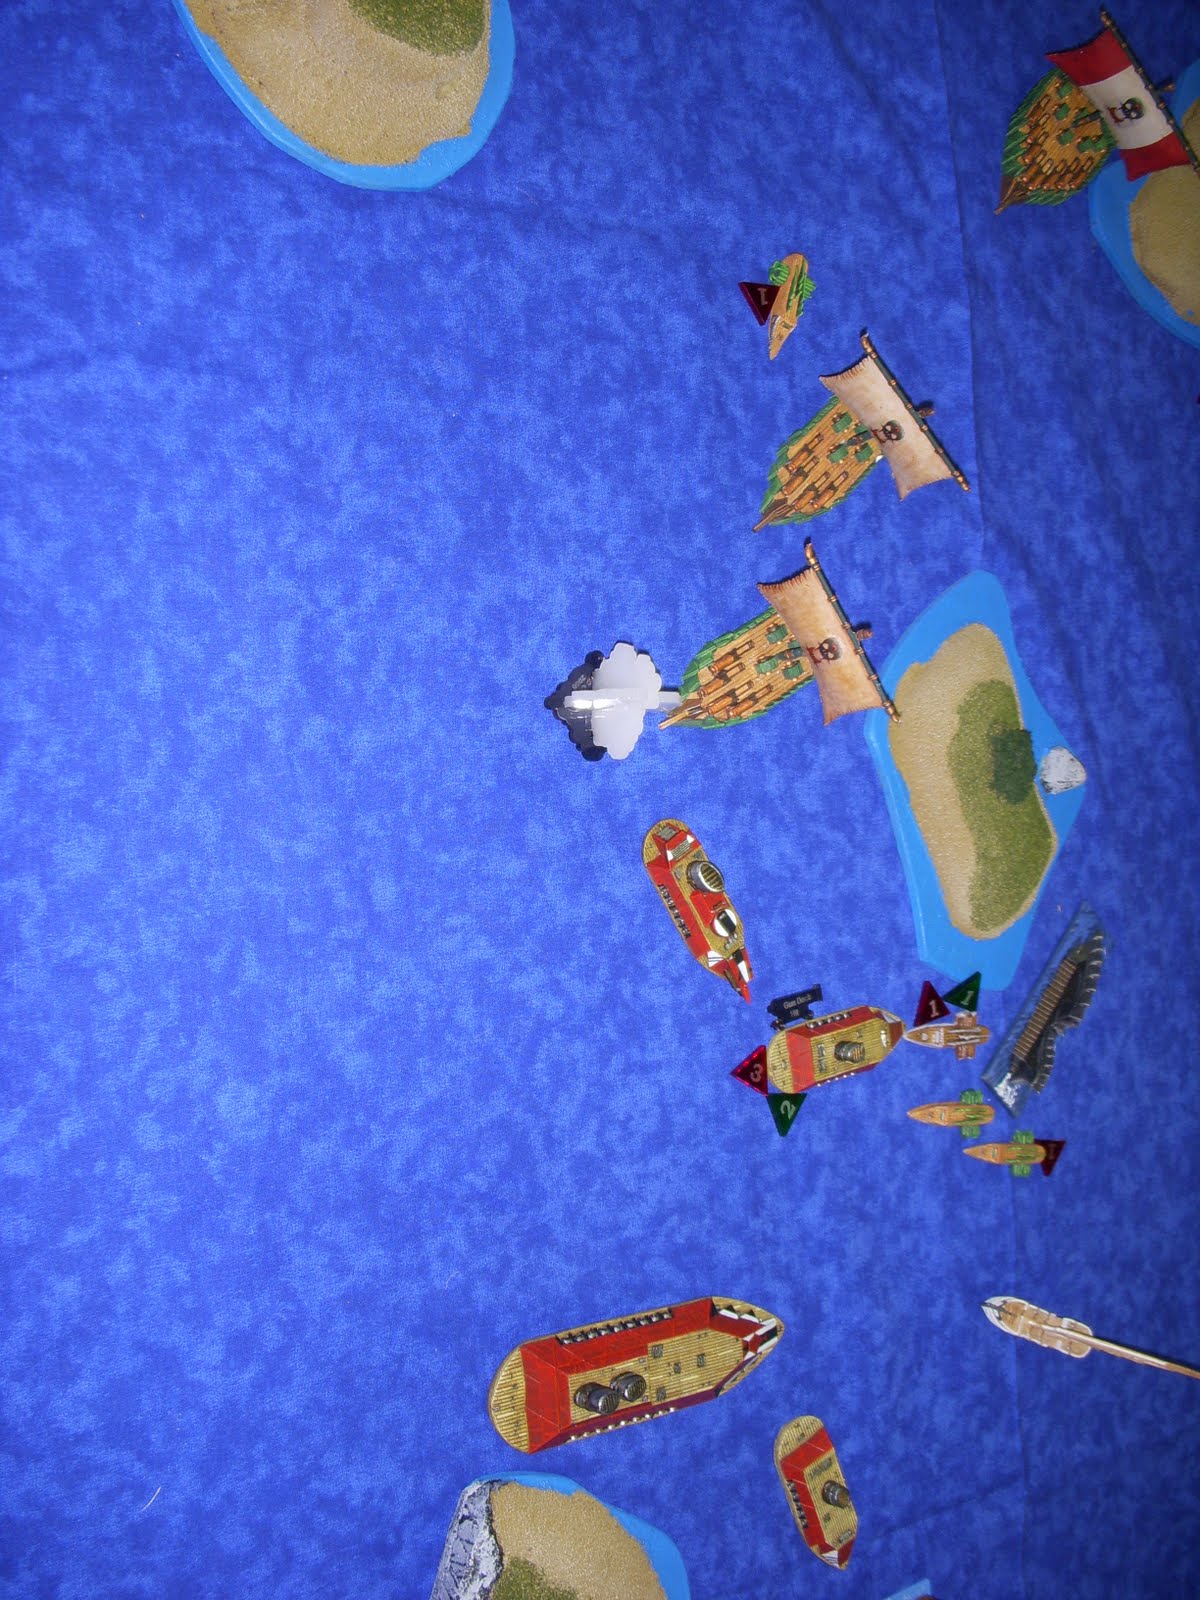
EV played Sandspit, and it actually went off, which was another first. I would have dropped it right in front of the IH fleet, but he stuck it down by the Orc destroyers. I digress though, that will come about later. In the present, the engagement begins in earnest. The IH frigates swoop in and take out one of the SM frigates, starting a cycle of violence.

The Shrouds respond in kind, sending taking out an IH frigate.

Now we can talk about Sandspit, which may well be two words. This is a spell that I've never seen in action because I always counter it before it can go off. You can see in the shot above how bunched the IH are, which is why I would have dropped the template where they are. EV put it in front of the Orc Destroyers, which I assume he was doing to try and cause a traffic jam where they would get rear-ended by the battlecruiser. This worked marginally, as one of the destroyers did get caught, but Kairaven managed to pull off some fancy sailing and avoid any major issues.

Amazingly enough, on the second turn I was getting into position. My cruisers ventured into the gap that I wanted to control and scored a distant crit on an IH cruiser.

Back north, the circle continues as more IH frigates join the fray and destroy another SM frigate. When will we learn that violence only leads to more violence?
So the frigate violence spreads to the south. While I've never faced them before, I know Orc frigates can do bad things, so they're a priority for me. It seems I'm also a priority for them, as an advancing squadron opens up on my frigates, destroying one and damaging another.

The natural response to this aggression was more violence, so I sent the frigates in. They took an eye for an eye, destroying one frigate and damaging another.

Of course my reprisal just invited another in turn, so the Orcs send in the cruisers to shoot my frigates some more, destroying another and damaging the formerly-pristine one.

Back north, the Shrouds are streaming towards the humans. A longish shot crits one of the IH heavy cruisers. The airship looms, a menace waiting to be unleashed.

The Humans recognize the menace and shoot up my airship some, causing a "can only go straight" flavored crit. This doesn't really bother me, as I plan to sail straight ahead and drop the bomb anyway.

It's been a while since a frigate died. My heavies relieve that tension by sinking two more Orc frigates. I'd really like to finish these frigates off and start working on the battleship.

Turn two saw a lot of dead frigates. I had expected some sort of flanking maneuver, and the Orcs are trying to creep around my southern flank, but mostly the fleets are sailing at each other and firing while doing so, which suits me just fine. I've come to the conclusion that the Iron Dwarves' best tactic is to sail to the middle of the board, killing as they go, then pound stuff from the middle. More specific to this game, my cruisers and battleship are getting into position to be the anvil. I'm not too sure how I'm going to squeeze the heavies in, so I start considering sending them south to deal with the battleship. Outside of frigates, losses for both sides are light, but damage is starting to accumulate here and there. End of turn 2.

Both flagships rolled the same perk, the +1 to initiative roll. VAtank and EV, as the flagship commanders, rolled for initiative throughout the game. I was happy with this arrangement as I can never win initiative. This time, EV pulled it out, and my airship cruised in to drop the bomb, though not before I played a repair turn card and brought it back to full strength. The IH cruisers fired as it came down on them, though the frigates and flagship did not. The bomb did its job well, taking out a cruiser and a frigate, as well as critting the other cruiser. It was about here that I realized there were Martyrs on the table.

Back in the middle, things start to get interesting. EV managed another turn spell that dropped a template, something that caused damage when you entered it. He dropped it in front of the IH heavies, hoping to finish one of them off as it was already damaged. As you can see, that didn't work out so well. You can also see the huge 3 frigate, 2 destroyer squadron bearing down on my cruisers, destroying one and critting the other. These ships are officially a problem as they're right in my face and will no doubt be boarding something next turn. I start weighing my options for clearing this mess out.

On the other side, the IH flagship gets into the thick of things and finished off a Shroud cruiser.

In an attempt to take out as much of the big frigate/destroyer squadron as possible, I split up my cruisers. The heavily damaged one heads straight into one frigate, while the other peels off to fire on a destroyer. I destroy the destroyer, but my ram is unimpressive. While I damage the frigate, I don't destroy it, so we go to boarding action. I lose 2 dwarves for 1 orc, and the fight continues. I was hoping to either destroy the frigate or lose my cruiser, which would open a path for my heavies to hopefully finish off the squadron, but things didn't work out like that.

In a call back to a quieter time, a lone SM frigate kills a lone IH frigate. Ah, the simplicity of frigate on frigate violence.

Back in the middle, the Orc cruisers start to round the island and join the fray. The lead one manages to crit my heavy, forcing it to use a larger turning template. Unless I repair the damage of course.

Turns out I didn't repair the damage, but I did sink that Orc cruiser that crit my heavies. I try to sink the frigate engaged with my cruiser, but that doesn't happen. I'd like to avoid another round of boarding, but may not be able to. The Orcs sank another of my frigates in the mean time. I was trying to shoot them through the Orc line so they could get around behind the battleship and start raking it, but I'm down to a single damaged frigate now, so even if it can get into position it probably won't do much.

Turn 3 saw lots of losses on all sides as the fleets closed the gap. Our subs had emerged at some point, but failed to do anything. My plan is actually working, to a degree. The Shrouds are making their way to the middle, shooting down humans as they go, while I'm set up in the gap and even have a wave of reinforcements for when my cruisers are finished. The Orc battleship, and cruisers for that matter, are troubling, but I figure I'll have a turn or two of shooting before they can ram. Hopefully that'll be enough. End of turn 3.

Unfortunately the Orc cruisers are a little faster than I thought. Combine that with a lost initiative roll and you get an Orc cruiser ramming and sinking one of my heavies. At least the heavy was already damaged...
As if that wasn't enough, the cruisers sink my cruiser too. At least my heavy has a clear line of advance now and won't be forced to ram the cruiser. This all happened because I mocked the 3 AD broadside of the Orc cruiser.

Still trying to clear out the middle group of frigates, I send the heavy in to wreck some shop. I ram the previously engaged frigate and send it below. I hit the destroyer with a broadside and crit it, then I fire the turret at a frigate which does nothing, and I finish up with another ineffective broadside into the Orc cruiser. Normally I'd be happy with one sunk ship and a crit on another, but I had hoped for more from this activation.

This next shot illustrates one problem I had with the team format: I had very little idea what was going on "up north." I noticed a destroyed marker in between the IH heavies, but I had no idea what happened. In looking at the previous pictures, I can deduce that it was a SM cruiser, but the fact remains that I had no idea what happened at the time. So, someone sank something somewhere.

My worst fears are not realized as the Orc frigates gangram my cruiser. I was sure they were coming for my battleship, but they turned before that happened. One frigate sank from the impact hits, but the Orcs played some dirty card that let them attacked before me, leading to an unsurprising decrewing and prizing of my cruiser. In addition, I would have no choice but to ram the Orc frigate in front of my battleship on it's activation. This didn't really bother me, but it did limit my options a bit.

My battleship goes in for the ram, and only manages a hit on the ram. Granted it's not a red ram, but it's still 9 ramming dice that I only managed to score 3-4 hits with. Instead of ramming and sinking the frigate, then firing on the destroyer in front of me, the IH heavy to my right, and the Orc cruisers lurking out of shot on my left, I'm left with a boarding action against the Orc frigate. I win the fight and prize the ship, while only losing a single dwarf, but I miss out on all those shots.

Some good news from close by: the Hammer is coming. The Shrouds bring some pain in the form of red rams, sending a cruiser squadron into the IH heavy cruisers. One of the heavies goes down from the ram.

The other heavy takes more convincing. It goes to a boarding action, which the Shrouds win, prizing the heavy and clearing the middle out a bit.

My airship begins to come around so it can rejoin the battle. I had figured I'd lose it after the bombing run, but the Humans all sailed right past it. This was somewhat surprising, but I wasn't going to complain. I sank something with it in this shot, I think a cruiser. Or perhaps I landed a crit on the flagship. Either way, the airship shot some humans.

Turn 4 was brutal. The center was becoming a bit of a parking lot, but it got cleared out real good this turn. I'm running low on ships now, down to my BS, HC, Kraken and blimp. The good news is the Humans are in worse shape than I am, with just their flagship remaining. The Orcs have both their big ships remaining, as well as those cruisers that are getting ready to ram and board my battleship. The big picture looks good though. The anvil has held, mostly, and I'm still occupying the gap. EV has cut a swathe through the Humans and will meet the Orcs head on, hopefully after I've softened them up a bit more. End of turn 4.

In the middle, I send my heavy cruiser in to beat up on the battlecruiser some. I drop a gunnery card, probably Full Broadside, and lay into the Orc ship. The result is a bit polarizing. I hit the magazine and send it sky-high. I'm as happy as can be at the result, because the Orcs are down to the one big ship now. EV is worried about his ships taking damage, as well he should be. The blast hits most everything in the center, taking out the remaining Orc destroyer, a SM cruiser, and doing damage to my heavy cruiser, the two Ripper tokens, and my battleship. It's quite the blow and really clears out the center. Most of the ID and SM damage comes from Kairaven having me roll all the explosion damage. This is a bit out of the ordinary for me, as when EV and I play we do rolls against the other's ship, but I can't blame Kairaven for wanting to use my dice against me.

The Orc cruisers come around to ram my battleship, but only one can make it in. I get lucky with impact hits, rolling a crit, then rolling a Superstructure hit, then following that up by rolling a 6 to do 4 points of damage to the cruiser and sink it. Good engineering saves the day.

The Orc battleship comes in to avenge it's fellows and sends my heavy to the bottom.

The explosion is what sealed the deal in my view. EV was going to have an uphill climb ahead of him, facing down two big Orc ships, but the explosion cleared things up in the middle and took one of those ships out of the equation. I've started putting damage on the Orc battleship, and EV just has to finish off the IH flagship before he can fully concentrate on the Orcs. Things look pretty solid for us now, though the Anvil has finally folded under the pressure. End of turn 5.

The inevitable ram occurs, with predictable results. My battleship is prized, but you can see the damage starting to add up on the Orc battleship, in terms of hull and crew both.

Turns out the Human flagship wasn't quite done. It set off another magazine explosion, though this one wasn't as effective as the previous one, just dinging the surrounding ships.

The Ripper surfaces, to great effect. EV manages a crit on the Orc cruiser, taking it to a single remaining hull point and leaving it two Holed Below tokens as a reminder. Unfortunately, the Ripper won't quite fit in the gap between cruiser and island, so it can't make the final pass that gives it its name.

Looking at this shot, things were closer than I had thought. EV was down to a flagship, 2 heavies, a ripper and a lone frigate. Granted the Orcs were left with a heavily damaged battleship, an even heavily-er damaged cruiser, and a damaged frigate, but those aren't the overwhelming odds I remembered them being. Obviously I was pretty confident of a victory here. My airship was undamaged, and the Orc ability to deal with it was diminishing with each boarding action. My Kraken was making its way south to be ineffective closer to the action. End of turn 6.

Kairaven pulls a Damage Repair Party, then plays it on his frigate. I guess he figured his battleship had a lot of crew damage, so it would be more effective on the frigate, but it still seems like an odd choice. EV has brought his flagship in for a broadside on the Orc battleship and landed a crit. In response, the Orcs activate their cruiser, which promptly sinks.

On the other side of the board, the Humans take the fight to the Shrouds and ram one of the heavy cruisers. Unfortunately it doesn't quite work out for them, as the Shrouds decrew the flagship, while the Humans leave a single Shroud alive to prize the flagship.

My airship cruises along a bit, then lights up the Orc battleship, landing another crit.

With his human allies dead or captured, Kairaven conceded here, a decision only slightly influenced by the fact that the store was closing in 10 minutes. A final shot of the battlefield. Or battlesea.

The team game was a lot of fun. It was a bloody affair, with both sides basically running out of the gate and throwing haymakers. The wind was a disappointment, since it never came into play, but it was good to see all the same. The game was a bit big for the time we had. Fortunately we had a couple magazine explosions to clear some ships out quickly, but as it was we would have run long, and if you take the explosions out it would have pushed a draw or an incomplete game, which would have been less than satisfying. But it was a first time thing, so we'll know to adjust points some next time.
amazing battle. lots of damage, and the hammer and anvil works very well with your allied fleet being stunties!!
ReplyDeleteit may be up on the forums already but i'd enjoy hearing some from the other half to see what their plan was/how they saw the battle unfold.
Actually, I did only have two cruisers per squadron, as I'd heard somewhere that they function better in pairs than in threes. I can't really say I noticed a difference, which may be due to them not gumming up each others LoS.
ReplyDeleteI thought that might have been the case, but I also thought I remembered you having a 3 cruiser squadron. Fixed now in any case. I think the 2 ship squadrons were pushed more for their additional activations and ability to spread out more to add in DF.
ReplyDeletealso for more opportunity to RAAAAAAAAM! it's easier to set up more rams with 2 ship squadrons than 3 ship squadrons. although the secondary effects of additional activations and spreading out for DF also help outweigh the negative of smaller linked shots.
ReplyDelete