pVlad + 5
Juggernaut - 7
Kodiak - 8
Doom Reavers - 6
UA - 2
Min WGI - 4
UA - 2
Rocketeer - 1
This list came about mostly because I wanted to use the Doomies. EV had tipped his hand somewhat about the Long Gunners, so I went with Vlad for the extra move on his feat. This didn't work out so well, but more of that later.
EV wanted to try a Long Gunner heavy list, so he used this tier 2 list:
pHaley + 5
Hunter - 6
Lancer - 6
Max Long Gunners - 9
UA - free with tier
Max Long Gunners - 9
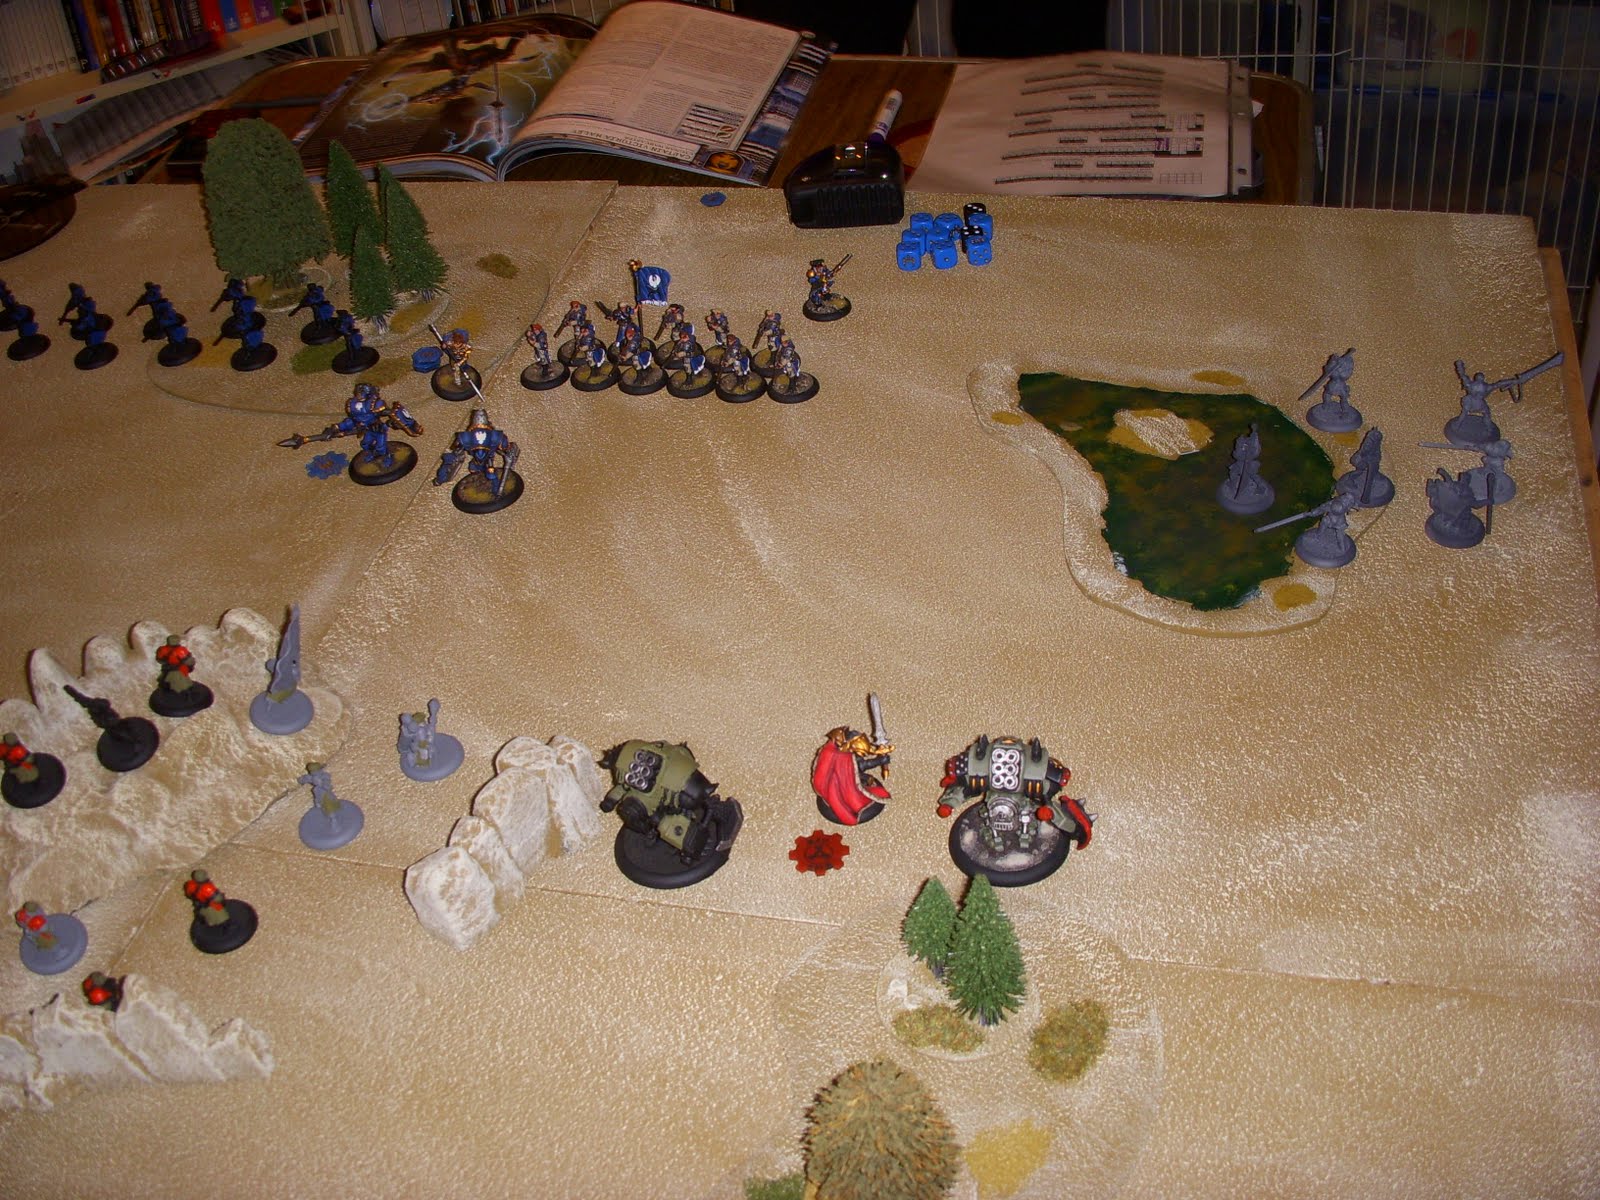
Khadoran deployment:

Cygnaran deployment.

Note the cowardly Long Gunner officer as far back as possible.

And both sides in one shot:

Yes that is my finger in the top left. I'm no photojournalist, just a writer. I put my Doomies on the flank, and deployed on the right side in general, as a bit of a refused flank. My original idea for the list was to run the WGI as a screen for the Doomies, but when I looked at what Abomination does I found that wouldn't work like I thought, so the Doomies ended up on the far flank with a nice Fearless buffer between them and the WGI. My plan was to sweep the Doomies up the side while the WGI went to the middle, and put Vlad and the jacks in between the two and set them up for charges.
After my first turn:

I considered popping Vlad's feat first turn, as there's no real reason not to, but decided to hold on to it for a devastating charge later. Nothing much happened the first turn as both sides closed the gap.
After my second turn:
The Doomies are over in the swamp because Long Gunners have Suppressing Fire like the WG Rifle Corps do, so I took them further out on the flank to avoid taking them all through what was effectively a instant death template. The WGI Rocketeer did nothing, as did the rest of the WGI. Vlad was using Wind Wall during the advance. We later found out that models have to be completely within 3 inches of Vlad and not just within 3 inches, but it wouldn't have changed anything other than bunching them up a little closer. Note the clump of WGI in the middle, acting like a decoy and drawing fire. This is what happens when you do that:

This is what's left of the unit after a single Chain Lightning. Max bounces, all kills. I also learned how Take Up works because of this, which is why there's no Rocketeer or Standard Bearer in this shot. After my turn 3:

This turn was not my finest hour. The WGI did a CRA and missed wildly. I managed to grossly miscalculate the charge range of my Kodiak. Turns out that range is 11" and not 19" like I'd thought, so the Kodiak ended up well short. At least I realized this before I declared a charge for him, so he just ran, but it didn't make any difference. Vlad hit Wind Wall again and I prepared to have him charged by a jack and/or Haley.
EV also shot up the Doomies real good, but they made a ton of Tough rolls and only lost 2 or 3 models to the full wrath of the Long Gunners with UA unit. From that I learned that it's hard to keep track of a unit that has 2 shots and can CRA. I thought some of the guys may have fired twice, meaning 4 times since they shoot twice, but we got it resolved and it all worked out well enough. For me at least. This is the end result:

You may have noticed the Long Gunners that shot the Doomies up were bunched up real tight into a double-ranked line. I'm not sure if EV thought he'd shoot the Doomies to pieces or just didn't know what lay in store for him, but when the Greylord UA walked up to the end of the line and unleashed his magic shotgun, it was total carnage. I didn't clip two of them, but the rest of the unit (minus the cowardly Officer) were cut down. The other two avoided this fate only to meet a Doomie up close, which ended the same way.
The death-stroke that I was expecting to fall on Vlad never came. EV charged my Kodiak, but left Vlad alone. I don't know why this happened, but about halfway through his turn I started thinking "If I can survive this turn, I have a chance." Survive I did, and I pulled it out. I was going to use the Kodiak to throw the Hunter into Haley, but of course the Kodiak wrecked the jack before it could be thrown. I'm still of two minds about the Kodiak. On the one hand, it destroys things real good. On the other, I often want those things to survive long enough for me to throw them, which they never do. If I was fighting a heavy jack this probably wouldn't be a problem, but EV likes the light jacks and they don't take a double fisting too well. In the end I put up Blood of Kings and walked into Haley with Vlad. I would have charged, but Haley had the 'no charging' spell up, so it had to be a saunter. I was worried because I only had 1 focus to buy an extra attack with, but it turns out that Haley wears paper for armor and it worked out for me.
Man of the match here was definitely the Greylord UA. I passed way too many Tough rolls, which kept my Doomies together long enough to eat a Long Gunner unit. Of course the Greylord did most of that work with his shotgun as well. I think my deployment helped too. Once the WGI were dead one of EV's Long Gunner units was effectively out of the fight. They may have shot down a Winter Guarder or two, but mostly they just watched.
Final casualties:

Vlad took ~6 damage as well, but I forgot to get him into the shot.
This comment has been removed by a blog administrator.
ReplyDelete