 |
| Lace 'em up Forrest, this is gonna be a long one. |
The game that is usually on Thursday got moved up to today (Tuesday) to accommodate my occasionally wonky schedule. During the list building phase of last night, I decided it was more than time to try out the Shock Troopers. After trying a few different combinations, the only thing I came up with that accounted for the slow, slow, sloooooooooooooooow nature of the Shock Troopers was more Men-o-War. Since I'd be embracing the slow slowness, Orsus seemed appropriate. Plus I think of him as part MoW anyway. Shield Walled, Iron Fleshed Shock Troopers should form a nice, solid wall that is hard to get through and blocks off whatever is behind it, which is a great idea until you want to attack from behind it. The answer? Bombardiers. Tough and slow, they fit the nascent theme of the list and could bomb away from behind the wall thanks to Arcing Fire. I toyed with a MoW Kovnik, but in the end I didn't have the points. Jacks were easy as my list building has calcified to an extent. Once I settled on Orsus, I knew I'd be taking a Juggernaut and a Kodiak. I couldn't manage an entirely MoW and jack list, so I had to venture into the small bases. My Ternion hasn't seen any table time in a shamefully long time, plus I wanted to get some reps in with the Iron Flesh + cloud combo, so in they went. They'd also add some infantry clearing and accuracy boosting in a pinch. The Great Bears rounded things out because...well, why not? My final list was thus:
35+6 points, 18 models
The Butcher of Khardov +6 points
* Juggernaut 7 points
* Kodiak 8 points
* War Dog 1 point
Great Bears of Gallowswood 5 points
Greylord Ternion 4 points
3 Man-O-War Bombardiers 7 points
5 Man-O-War Shocktroopers 9 points
I've already laid out the general approach above, but just to reiterate: brick up, crawl forward, lob grenades. An objective scenario would screw me pretty good, but isn't that always the case? Some cocktail napkin math told me that if I ran one turns one and two I could make the center line, with Iron Flesh up but without Shield Wall. Hopefully it wouldn't come to that.
 |
| Still running. Hope you brought some water. |
After eCaine's showing in the last game, I didn't expect EV to field him again today, but I did think I'd see something like the gun line he ran last game. When he pulled out eGaspy instead, I was rather surprised. At first I was concerned about all the infantry, but after a moment's reflection I thought it was a good match-up for me. The Bombardiers would have plenty of targets (and ones they could kill to boot), and my ARM + boxes should help weather the inevitable charges. The Bile Thralls were more of a concern than usual, but I hoped I could work around them. EV's list was unchanged from the last time he played eGaspy, but it's been a while so I'll repost it because I'm just that helpful.
35+6 points, 36 models
Lich Lord Asphyxious +6 points
* Cankerworm 5 points
* 2x Nightwretch 4 points each
* Skarlock Thrall 2 points
10 Bane Thralls 8 points
6 Bile Thralls 5 points
Bloat Thrall 2 points
10 Mechanithralls 5 points
* 1 Brute Thrall 1 point
Withershadow Combine 5 points
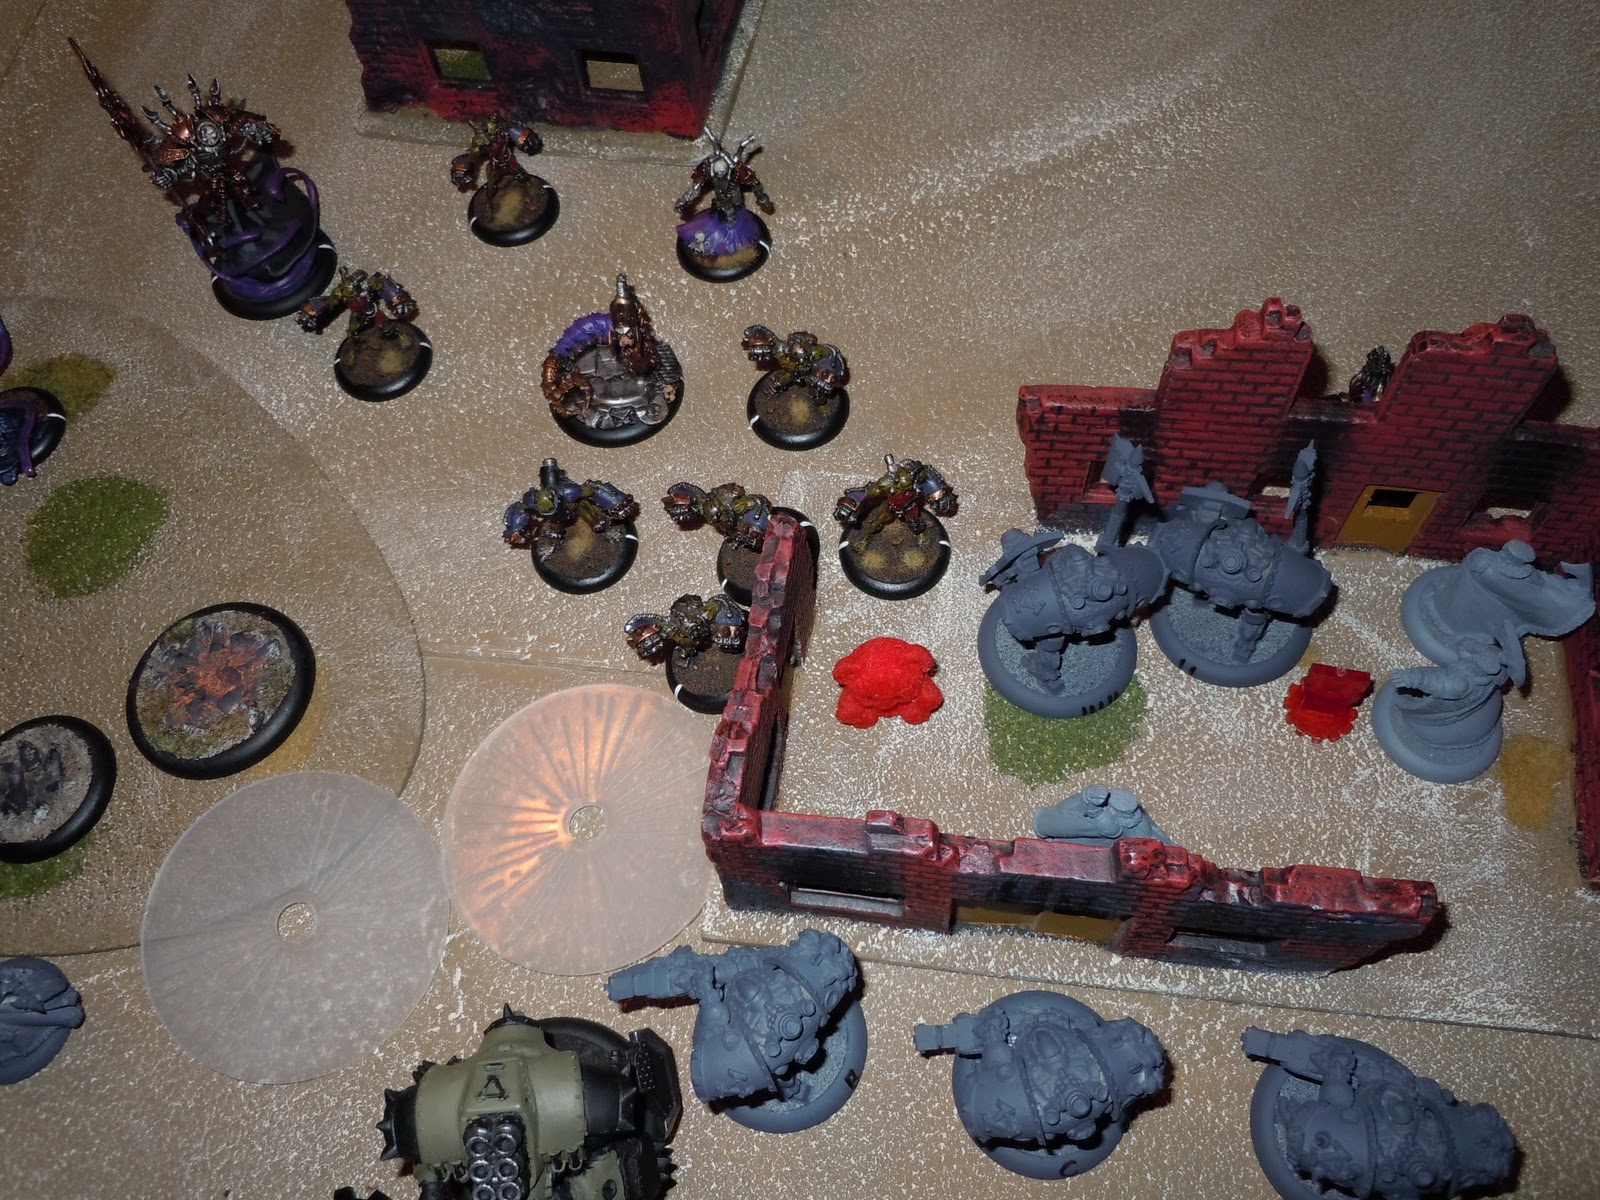
Heavily outnumbered again, I had faith in the Motherland's thick armor and the stout hearts of her soldiers. We rolled up Mangled Metal first, then rolled again and got the two objective scenario. Looking at the description I knew I was sunk from the beginning. With 22" between the edges of the two objective zones I'd never be able to cover both, so winning by scenario was right out. After terrain went down my resolve was firmed: the center forest was back, and there was plenty of other terrain around. My saving grace was that EV won the roll to go first and didn't defer, so I'd be able to deploy in response to him. Fortunately the unit that worried me the most (Bile Thralls) was shoved out to the left flank, so my choice of which side to neglect was an easy one. This meant I'd be lining up against the Bane Thralls (and Fatty Arbuckle), but I liked that matchup more than Purge Purge Purge. I put the Shock Troopers as far forward as possible, then the Bombardiers behind them, then my small bases. Just to the side was Orsus and my jacks. The Kodiak pulled the inside lane because of the (oh so common) center forest. I had a few moments of panic while figuring out if the objective area was a 5" diameter (in which case I had no chance of getting anything into it by the end of turn 2) or a 5" radius (which would make things much easier). Turns out it's a radius, so the turtle was in business. Though I was fighting for a draw (on scenario) from the beginning, I was ready to come out swinging.
 |
| The armies take the field. |
Turn 1
EV advanced. Apparently eGaspy has no buffs, so there wasn't even a spell to track. Everything except the Bile Thralls started moving right. If those stupid Biles wanted to spend the whole game camping in the woods I was happy to oblige.
 |
| Cryx turn one. |
In comparison my first turn was packed with action. Excepting the Greylords and Orsus, everything ran straight forward. The Ternion dropped clouds on some Men-o-War (turns out the cloud spell has a much shorter range than I thought, hence the cloud on the Bombardier) and the Butcher Iron Fleshed the Shock Troopers. Because the zone was a radius and not a diameter, I'd be able to advance and Shield Wall next turn, which should improve my survivability in a pleasing, to me, way.
 |
| Khador turn one. |
Turn 2
Not much doing on turn 2 for the undead. The Bloat Thrall took a shot at the Shock Troopers but missed and deviated into irrelevance. EV also laid some caustic clouds in the objective building.
 |
| Cryx turn two. |
I figured out that I had just enough room to fit the Men-o-War against the outside of the building and have them be in the objective zone, so I didn't have to deal with the clouds. Even better, the Shock Troopers were close enough to Shield Wall forward and contest the objective. After a discussion about how Arcing Fire works (EV thought Shield Wall would block it, I thought I could shoot over not 1" away from the potential target) the Bombardiers opened up on the Bane Thralls, killing three.
 |
| Let the barrage begin. |
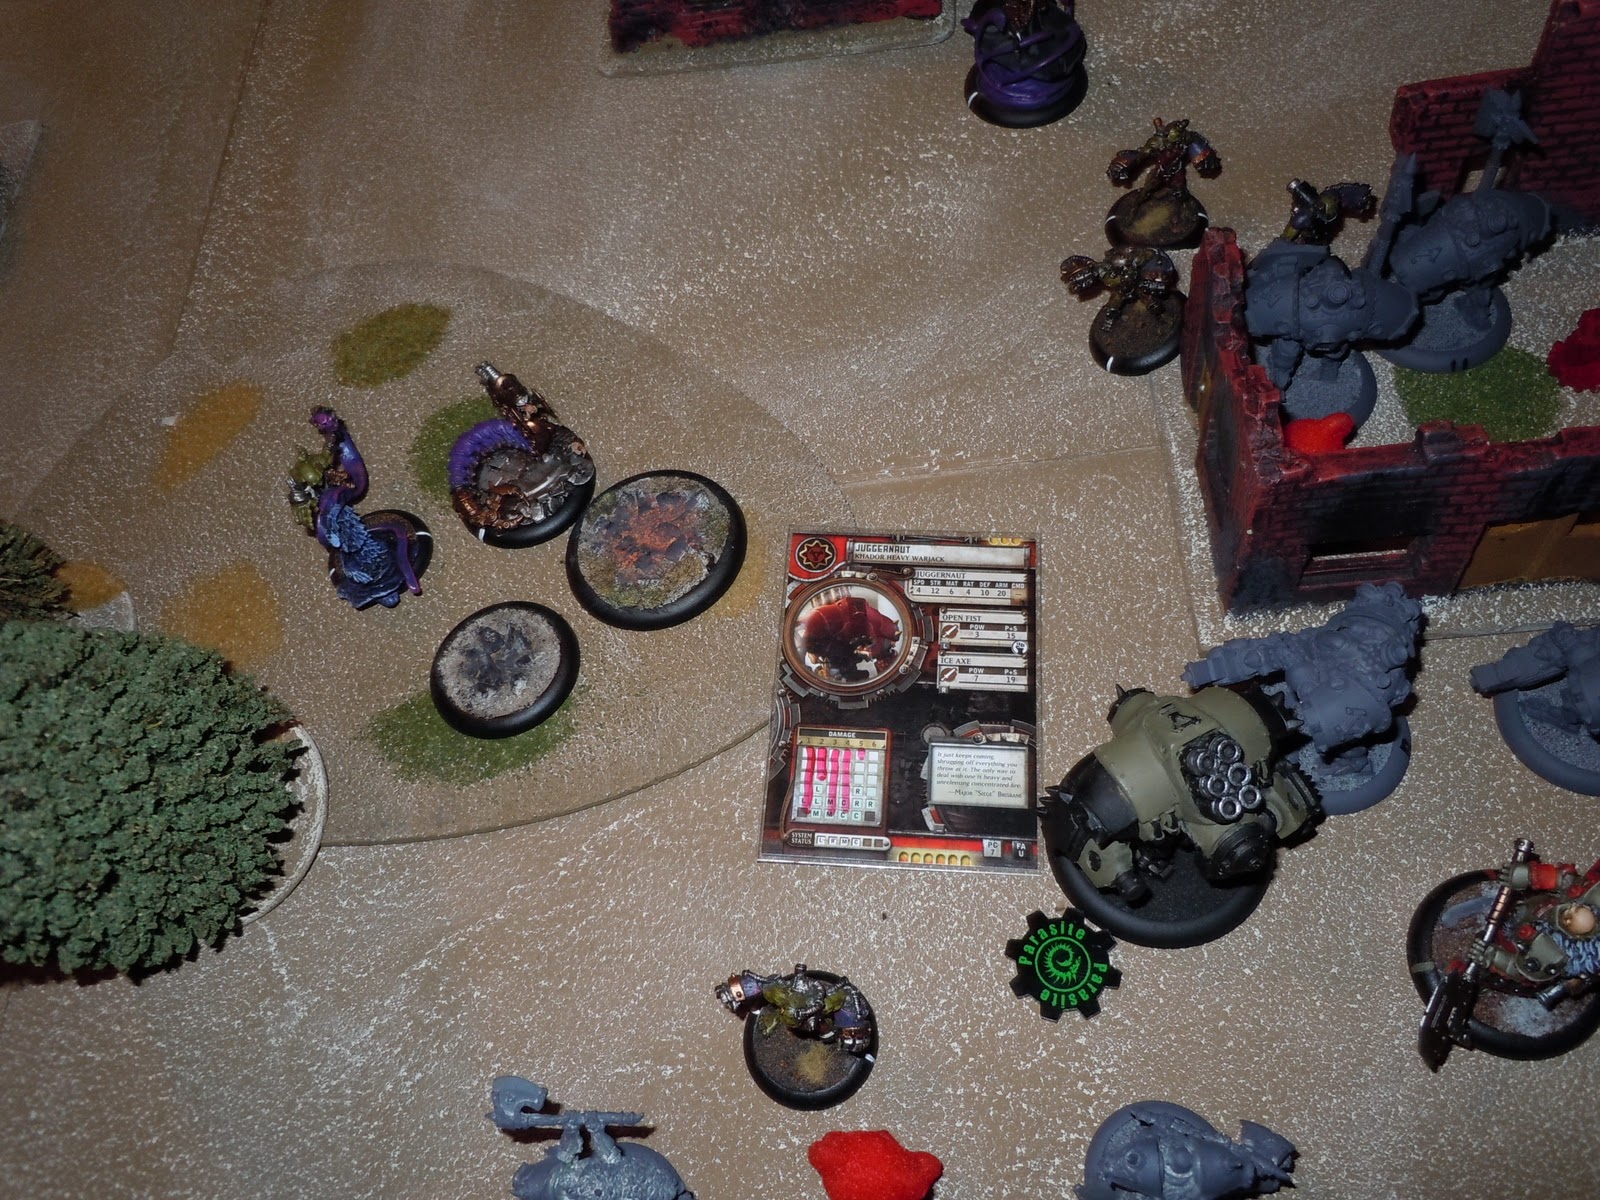
The Greylords put up their clouds again, completing the Shock Trooper wall of doom. DEF 14 (16 against shooting), ARM 21, 8 boxes, big ol' bases. I put the Kodiak in the woods to hopefully avoid Bane Thrall charges. The Juggernaut filled the charge lane between the woods and the building, and I positioned the War Dog so it would have a nice lane for a Counter Charge.
 |
| Khador turn two. |
Turn 3
The whole hiding the Kodiak in the woods thing didn't work out too well. First EV arced Parasite onto the Kodiak, then charged the Cankerworm in. Despite only having the one AP attack, the addition of Parasite meant that one attack took out a third of the jack, including an arm.
 |
| That worm isn't very nice. |
Next the Banes charged my jacks. Before the pain began I sent the dog in to lessen the blow a bit, then used Return to bring him in closer to Orsus.
 |
| This dog? Very nice indeed. |
Only one Bane made it in, but it got a good swing for its efforts. Another third of a jack gone at a stroke. At least this one didn't take any systems out.
 |
| Charging Weapon Masters hurt. |
And that was that. The MechThralls advanced in a generic, towards-the-center manner. The Bile Thralls took full possession of the left objective, but with my Shock Troopers in the right zone there was no scenario victory. I didn't like all those Banes in so close and made it a point to clear them out some in my turn.
 |
| Cryx turn three. |
The Shock Troopers started off. I had disparaged the Shock Trooper's Shield Cannons at the beginning of the game, but they took out the Fat Thrall easy enough.
 |
| Who uses a RNG 6 gun? I do. |
The rest of the Shock Troopers took out a Bane, but did little else. They did present a sizeable road block though. Nothing was getting through that building. Reach is a great ability.
 |
| Locking down the objective. |
Next the Bombardiers took out some more Thralls. The auto-miss for Stealth made the Banes a bit tricky to take out. With an ARM around 15, POW 7 blast damage had a fair job to do in getting through the armor. The Bombardiers were getting the job done, but too slowly for comfort.
 |
| Keep firing lads. |
Trying to keep the Kodiak alive, and do some damage, I put up Full Throttle and sent the Kodiak in to take some swings. The good arm took out the Brute Thrall, while the gimpy arm dinged the bonejack. With all the Banes around to tenderize them I was anxious to keep my jacks away from the Withershadow.
 |
| Send in the gimp. |
And that was about it. I thought EV might be plotting an assassination run, hence the cloud on Orsus and the Juggernaut's placement (hopefully far enough away so a Bane couldn't charge the Juggy and engage the Butcher). I moved the War Dog far enough ahead for the same reason as the Juggy. With the Reaching Shock Troopers inside the building, I figured on getting a free strike at anything that might charge the dog before I got a Counter Charge in and Returned out of danger. The Great Bears hung well back, waiting for an opening.
 |
| Khador turn three. |
Turn 4
Turns out I didn't hide the Kodiak well enough. The Cankerworm came in to take an Armor Piercing bite before running back into the woods to hide. The MechThralls came in and finished it off easy enough, even without the Brute Thrall. At least EV wouldn't be able to turn it into a Cryx jack.
 |
| Poor Kodiak, it died too young. |
I learned a good lesson here, for what felt like the 1,000th time. When the MechThralls charged I thought about Counter Charging (EV even mentioned it), but I was holding out for the Withershadow. When a Bane charged the dog, my first thought was that Reaching free strike. Because I'm inattentive about the direction my models face, EV could get the charge in without leaving the Shock Trooper's front arc. (I don't quite understand why one trooper will watch an enemy walk up and kill a comrade without lifting a finger, but once that enemy walks past them they go into a frenzy.) The attack hit and the dice couldn't fail to kill the dog. With an inadequate Tough roll, I lose the dog. At least I got a reminder about facing and how free strikes work.
 |
| Alas, no free strike to be had. |
I believe the Banes also charged the Shock Troopers, but didn't take any out. EV was running out of Banes, and I wasn't sure that MechThralls could deal with DEF 14 Shock Troopers. The Withershadow was troublesome, but I was through most of the troops that scared me.
 |
| Cryx turn four. |
With the lines good and close, I popped Butcher's feat and got to work making scraps. Orsus kicked the fun off by taking out a Bane with his Blunderbuss to clear up a lane for the Juggy.
 |
| The Butcher steps up. |
Next the Shock Troopers took out some more Banes. I had two CMA the bonejack, but they missed despite needing a 6. Of note I moved the leftmost model so his shoulders were squarer to the back edges so he'd be able to get a free strike off. Hopefully.
 |
| This time the alley is covered. |
The Ternion came in and redeemed that flank a bit. A pair of sprays took out two of the Withershadow and scratched up the bonejack pretty good.
 |
| No more jack factory. |
Then the Bombardiers opened up and erased two MechThralls. The Bombardiers were working fairly well so far. Being able to plant (in the zone) and blast away made them a bit more accurate (when not shooting at Stealthed things), and hiding behind the Shock Troopers meant they didn't have to worry about melee troops coming up and engaging them. Are they worth 7 points for the three of them? I'm not sure, but they did better in this game than they have in previous ones.
 |
| I love the sound of artillery in the morning. |
In the middle the Great Bears came in to finish the bonejack. I sent two, but it only took one half of one Bear to get the job done.
 |
| Those are some great Bears. |
The Juggernaut was left without anything to kill. so it stepped back a bit to shield the Butcher. The Great Bears are far too exposed for my liking, but I was anxious to get them some action, plus the woods should keep most things from charging or just walking up and swinging. I had whittled down most of EV's infantry with little loss in return, Kodiak aside. Now to look for my shot at Gaspy.
 |
| Khador turn four. |
Turn 5
EV brought the MechThralls in against the Shock Troopers. One of them connected and finished off the damage Man-o-War. Fortunately for me it was the leader, so I got to swap it out and deprive the Thralls who had yet to swing of their attacks.
 |
| One down, four to go. |
EV laid down a solid screen of clouds to shield the MechThralls, and his turn was over. By holding the gap in the building I kept EV from swarming my Shock Troopers with his Thralls, leading to a Thermopylae-esque situation where a few elite soldiers held off the more humble horde.
 |
| Cryx turn five. |
I was close to running EV out of infantry and kept at it with the Shock Troopers. The two in the building killed a MechThrall each, while the two on the outside again missed with their CMA.
 |
| The top two do not play well with others. |
Then the Greylords got to work. If I'd been thinking I probably would have activated them before the Shock Troopers and Ice Caged the bonejack, but that's not how it worked. Instead they pumped two sprays into it, doing some decent damage in the process. The other Greylord sprayed into the Thralls, taking out two and damaging the Cankerworm as well.
 |
| Sprays are amazing. |
Then the Bombardiers cleared out most of the remaining MechThralls. Have I mentioned these guys did well this game yet?
 |
| They drop bombs like Hiroshima. |
It was right around here that I remembered I'd moved one of the cloud templates that couldn't lay on the table or balance on the building. I'd moved one of my Greylords into it, without realizing it was there of course, which would have killed him as soon as he was done moving. Fortunately I realized this before we got too much farther, so some MechThralls came back and the Cankerworm wasn't damaged after all.
 |
| The perils of forgetting about toxic clouds. |
I brought the Great Bears back to hopefully keep them away from charges. The Juggernaut blocked up LoS to Orsus while (also hopefully) providing free strike coverage to the Great Bears, with a Shock Trooper doing the same for the alley between the woods and the building.
 |
| Khador turn five. |
Turn 6
Turns out I didn't get the free strike lanes quite right, so EV got a charge in on one of the Bears. The MechThrall connected, I failed the Tough roll, and the Bears were down to a pair. This was quite the keyhole charge to dodge the free strikes while also not clipping the woods.
 |
| Despite my best efforts... |
I learned to really hate the Cankerworm this game. It hadn't been impressive before, even when we weren't quite sure how it worked and it got more attacks than it should have. It folded under light pressure and wasn't much of a threat. This game it was a constant thorn that I could never quite lay a hand on. It's amazing what a full advance at the end of your activation will do.
 |
| Hate that worm. |
And that was all. The MechThralls didn't do anything to the Shock Troopers. Gaspy floated rather close to my troops, but there wasn't much I could do about it. My big hitters were on the wrong side of the building, well out of range to get anything done. Had my Shock Troopers dealt with the remaining bonejack this wouldn't have been such an issue, but since they couldn't land a CMA the resulting situation was less than ideal.
 |
| Cryx turn six. |
Starting my turn, the Shock Troopers finally got their acts together...by acting independently. I skipped the CMA and had one of them hit. The blow almost killed the bonejack, but not quite. In the building two more MechThralls died. I loved how the Shock Troopers performed in this game, except for their killing potential. They took plenty of blows but couldn't dish many out in return. Giving them Thresher would change a whole lot, but perhaps a shield attack? Something to clear out a bit more infantry per turn would be very welcome.
 |
| Working better separate than together. |
The Great Bears got well out of the way while the Juggy cleaned up the stray MechThrall.
 |
| Squash that bug. |
EV was all but out of pieces, yet I had no good idea on how to get at Gaspy. With Hellbound up he projected a bubble of rough terrain and couldn't be charged. I suppose I could have shot him up, since eGaspy (amazingly) lacks Stealth, but at the time I was focused on delivering axe to mouth. To that end, I hoped to pin him down with the Shock Troopers long enough for the Butcher and the Bears to come around the back of the building and join the fun.
 |
| Khador turn six. |
Turn 7
More Cankerworm to start turn seven. With Pathfinder and the after activation advance the stupid worm could eat my jacks in little bites at its leisure. In retrospect I should have moved my jacks away from the woods so I might have had some chance at doing something to it. Between Parry and Stealth I don't know what that something would have been, but it would have been better than just watching my jacks go slowly down.
 |
| Hate that worm! |
EV took a good long think about feating here, but decided against it. He did send Gaspy against the Shock Troopers though, but didn't get anything done. With Gaspy engaged, I could start working on my plan. The only problem was Hellbound, and it's quite the problem. Still I had my chance here, so I was going to make the most of it.
 |
| Cryx turn seven. |
I brought the Shock Troopers in on Gaspy, but didn't get much accomplished. Three damage wasn't much to show for a pair of P+S 14 attacks. I could have gone the CMA route, but considering how well that worked for me throughout the game I figured I was better off with single shots. Still couldn't finish off the stupid bonejack either.
 |
| Great at taking hits, not so great at giving them. |
The Bombardiers were almost out of targets. With Gaspy and the bonejack in melee and the Cankerworm hiding in the woods (with Stealth no less), the only option was the Skarlock, who was made redead in short order.
 |
| One less Skarlock in the world. |
The guys with the big axes started their sweep around the building. Wary of Gaspy's feat (which I've never seen but have heard is vicious), I put Iron Flesh up on Orsus and tried to arrange the Bears in free strike formation. I had no idea how I'd get into combat with Gaspy before he killed enough Shock Troopers to disengage, but I hoped to figure it out on the way in. Hellbound is a horrible, tricksy spell. The rough terrain I can deal with, but not being able to charge Gaspy is quite a hill to climb.
 |
| Khador turn seven. |
Turn 8
The game was getting surreal at this point. How long had we been going? Long enough that turns took next to no time. With three pieces (barring the Bile Thralls camping on the other side of the board. Remember them?) remaining, I had no doubt who would start off turn eight. That damn worm. One less Shock Trooper to swing at Gaspy.
 |
| Hate that worm!!! |
Two less Shock Troopers.
 |
| No sustained attack, still effective. |
The final bonejack came out to block the charge lane to Gaspy. This wasn't necessary since I couldn't charge him in the first place, but I guess practice never hurts.
 |
| Cryx turn eight. |
Since I couldn't do it in melee, I had to try it at range. The Greylords got a pair of Ice Cages on Gaspy, then the fusillade began. One Shield Cannon and three Bombardiers later, Gaspy was down to 5 boxes.
 |
| Poppin' a cap in that lich. |
The Great Bears came in to, at long long last, finish the bonejack. They also ended up blocking any charges on Orsus from Gaspy, not that I was too worried about it.
 |
| Great Bears - 2, Bonejacks - 0. |
I brought in Orsus for the coup de grace, but came up short. The consequence of this can be seen hiding in a corner in this shot.
 |
| Khador turn eight. |
Turn 9
The dread feat turn. This was the third or fourth game that EV ran eGaspy, but this was the first time I'd seen his feat. It was unfortunate, but the Butcher pulled through.
 |
| How did the Greylords survive? I have no idea. |
After the ghosts disappeared, Gaspy began his retreat. We had reached a stalemate. I held the one objective, while EV had the other. I didn't have anything fast enough to run down Gaspy, EV wasn't about to come charging into my little safe house, plus we had reached the edge of our gaming window for the day. Thus we called it a draw.
 |
| Stalemate achieved. |
I said the game was a draw just now, but I'm calling it a moral victory. I took the right objective for the Motherland and held it against wave after wave of undead horrors. Granted EV was down a unit with the Bile Thralls having a picnic on the left objective, but at the end of the day Orsus was watching Gaspy slink off behind cover. Sometimes you take what you can get.
 |
| We made it! |
The Men-o-War really impressed me this game. The Shock Troopers were an unbreakable wall (until I took down Iron Flesh and they got hit by a caster and a jack). They didn't move very fast and didn't kill a whole lot of stuff, but they took a ton of hits and shrugged most of them off. Once I figure out the free strike mojo I'm sure their Reach will be very welcome as well. The Bombardiers had a good showing as well. Considering I used them like I imagine they were intended, as fire support and a potential second wave, this isn't so surprising. Despite my inability to seal the deal, I like how this list worked. It's awful similar to a pButcher tier list, which may have been by design. Of course with that list I'll lose the Greylords and Great Bears, but I'll gain lots of Manhunters and extra speed, so I think it's a good trade. Slowness aside, the list played in the way I wanted it to (shrugging off blows and grinding down foes). If only I could find a scenario that forced my opponent to keep advancing into guns and axes then everything would be perfect. Since that won't happen, I guess I still need to work on assassination, even with an ultra-attrition list.


Agree about the tier list point - when I saw your list I thought "wouldn't Butcher's tier be better?" The speed bump is incredibly useful for Men-o-War.
ReplyDeleteOne issue the tier sometimes has is clearing out horde infantry - consider replacing the Juggernaut with a Devastator. You lose a little hitting power, but gain rain of death and two-handed throws. In this battle you might have been able to have a similar (but less effective) threat using the Kodiak's vent steam. Using that on the Mechthralls might have helped you.
Vent Steam only works on living models, which rules out most of Cryx. I actually got to use it on pDenny a couple days ago and was amazed that she wasn't undead. It was the first time I'd used it for damage and not just concealment.
ReplyDeleteI like the Devastator, but if I'm trying to run a tier 4 list at 35 points, things are real tight. Instead of Yuri I could take a Widowmaker Marksman, or another regular Manhunter, and bump the Kodiak up to a Devastator. Problem is Yuri makes the Manhunters extra sexy, and Thresher is nothing to sneer at either. Having AD on the jacks isn't 100% required, but like Yuri the perk is half the reason for doing the points gymnastics in the first place. If I ever get the list up to 50 then there's definitely a place for the Devastator.
I'm already committed (mentally) to getting the rest of the pieces for the tier list during the Warstore's Black Friday sale, so it won't be long before I can try all this out on the table. This psuedo theme force, with most of the restrictions and none of the benefits, has been a blast, so when I get the perks out of it I imagine it will be even better.
"but if I'm trying to run a tier 4 list at 35 points" - I see this a lot. People seem to think that if they are running a tier list, they need to get it to Tier 4. Clearly there are benefits in doing so, but it's not required. The Tier 4 benefit for the Butcher's theme is great, but Khadoran jacks are too expensive to do it without compromising the army elsewhere. The Tier 2 bonus is a good benefit to aim for, as it really, really, really helps.
ReplyDeleteFWIW, my 35pt tier for Butcher is as follows:
Butcher
War dog
Kodiak (essential: pathfinder is too valuable to lose, especially in a list that is generally so slow)
Devastator
Max Shocktroopers
Min Demo Corps
Widowmakers
Marksman
Yuri
It's tier 2, but I find it works well. It's ended up as my favourite list for objective games.
Yuri and the Kodiak are terrain clearers, Widowmakers + Marksman are to target things staying away from the slower core. The important part is the speed bonus for the Men'o'war. In scenario games that is amazing, as you get 5 very tough models and 3 hard hitting models (who can each attack twice!) around an objective. Butcher and the Devastator can be a little more reactive in their use.
To get to 50 add a juggernaut and whatever you fancy, aiming for tier 4.
I've thought about doing just that, shooting for t2 and going heavy on the MoW. If I went that route I'd probably stick in some Bombardiers as ranged support just to keep with the theme, though your list looks solid as it is. I've had a lot of fun with MoW of late (it's amazing how Shock Troopers make the whole MoW chassis look better), but ultimately they're not what I'm (currently) looking for when I look at the pButcher theme list.
ReplyDeleteWhat it comes down to is this: Full Throttle. It's an amazing spell that only gets better with more jacks, at least with certain jacks. Juggernauts, Kodiaks, Berserkers, all of these look good with Full Throttle up. The Devastator though, not so much. Rain of Death is great, but it doesn't benefit as much from Full Throttle. Granted the fists will, but to use them you have to open the thing up. Of course you can buy fist attacks after you RoD, but with Full Throttle going and Iron Flesh surely being upkept, that only leaves 2 possible Focus for the Devastator. Compare with the initial attacks of the other three, plus their ability to attack without making themselves more vulnerable than they usually are, and for me the answer is an easy one.
With all that in mind, I want to run at least two jacks with Orsus, and three would be even better. I can fit three into a t4 list and not sacrifice a whole lot to do it. Granted it's a tight fit, but it gets everything up the field quickly. At t2 the jacks would form a nice second wave, but the appeal of the theme list as a whole is that it throws all that armor across the table and forces your opponent to deal with it all right now.
In the end it's all theorymachine at the moment as I don't have the pieces (yet) for a t4 list. Once I get them all together I'm sure I'll try the various options available. Unfortunately for Orsus, a new MoW hotness has appeared of late: eIrusk. On paper he looks like a much better fit for a horde of MoW. Of course all of this will have to play out on the table.